Importing LAS Files
The import las files dialog consists of several import options to select data, a destination and how to parse the header of the incoming the LAS files.
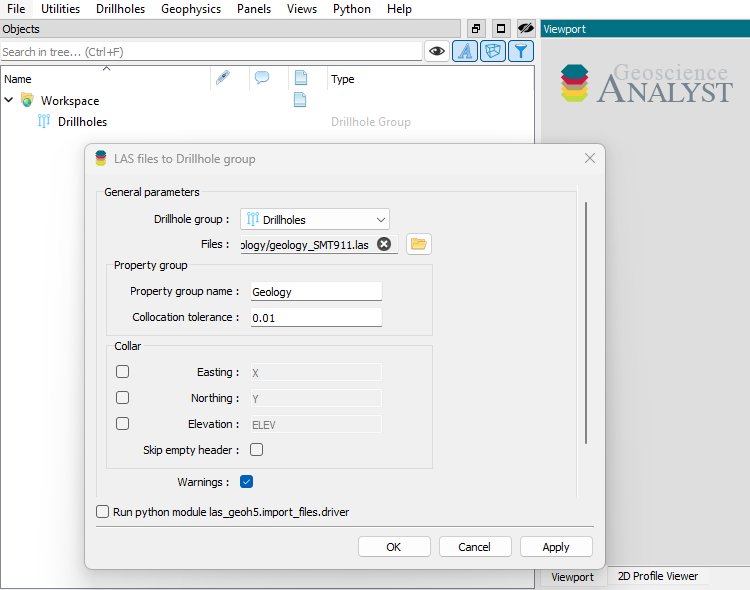
The import dialog is separated into import and header groups.
Import dialog.
LAS file imports will be directed to a drillhole group. Users can use an existing
group, or allow las-geoh5 to create one automatically. For every import operation
the user will need to select the LAS files to import from. The files are expected
to collect the same type of data at similar sampling intervals. In order to
organize the data by property, the user provides the Depth table name and a
Collocation tolerance that is used to determine if incoming data should be
included in existing property groups with the same name. A new property group is
created if the incoming depth sampling is outside of the collocation tolerance.
The Collar header fields section gives the user the option to provide collar
location field names expected to be found in the header of the LAS files being
imported. This is a necessary step since the LAS format does not include a standard
for this information. It may be necessary to scan the files to find field names
that apply to all (or most) of the files. Just open the files in an editor and look
in the Well section of the header for something that looks like
easting/northing/elevation data.
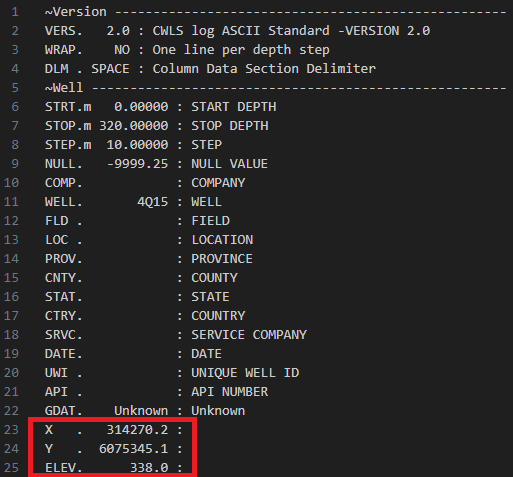
Scanning LAS file headers for collar location data.
The user may also choose to skip_empty_header to ignore files that do not contain
collar location information as this may lead to many drillholes without location data
being piled up at the origin.